
(Scroll down a bit if you're not interested in reading about all the toaster ovens that I have tried and why they didn't work for baking perfect cupcakes.)
An alternative title for this blog post could be "Why I Tried Five Different Toaster Ovens in the Span of a Few Weeks!' I'll throw in some pictures of a few of the cupcakes I've made in my toaster oven to break up the text a bit. I wouldn't want you to die of boredom.
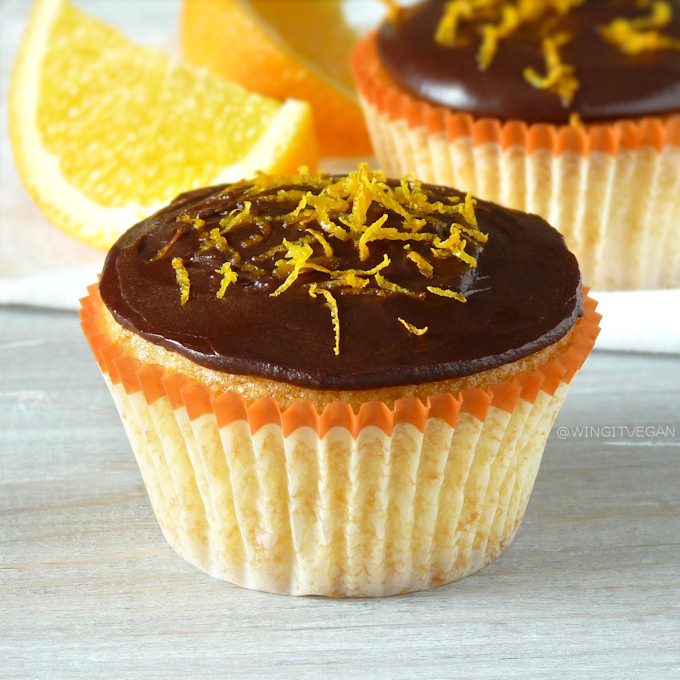 *Orange Cupcakes with Chocolate Ganache
Last year Mr. Wing-It and I switched from devouring whole cakes to eating mini cakes or single cupcakes. The thing is that whenever I baked a whole cake or a whole batch of cupcakes, we would attack the sugary goodness as soon as it came out of the oven and we wouldn't stop until every last crumb had been dutifully inhaled.
Gluttons. Yes, I know. We were like cake locust. Or like the Vashta Nerada.*
In lieu of self control, I started baking two cupcakes at a time, or tiny four inch cakes instead of full sized ones. Same with cookies, instead of baking a dozen cookies I'd bake two big ones or four or six tiny ones. It's the only way to make sure we will not wolf down an entire cake or a whole batch of cookies in 24 hours! If it's not there, we can't eat it.
Make a full batch and freeze it for later, you say? Tried. Can't. Must eat ALL the cake in the house.
 * Gooey Chocolate Chip Cupcakes for Two
Anyway, at the time we only had a tiny Black & Decker toaster oven that had served us well for years whenever we wanted to make toast or reheat leftover pizza and whatnot. But it wasn't great for baking because the top and bottom heating elements were too close to the cakes or cookies or whatever it was I wanted to bake. I don't think they even make that model anymore.
So, I bought a bigger Black & Decker convection oven that had more distance between the heating elements and the baking rack. Unfortunately, it had a forced convection bake mode and no regular non-fan bake setting and the strength of the fan was too much for my delicate cakes. They ended up being dry and cracked on the top, even when I reduced the temperature by 25 degrees.
I returned that one and bought a Farberware digital toaster oven . I loved it! It baked beautiful fuss-free cupcakes and cookies. It was easy to set up, the convection function was optional, and I could customize my bakes as I pleased. But the noise! The NOISE! I am used to beeping things. Our microwave beeps, our regular oven beeps, there is a small heater in the bathroom that beeps, and I have had lots of beeping things in the past. Beeping things are OK. But that oven was so loud I couldn't stand it! I returned it with a heavy heart. If you have a baby or you live with someone who works overnight shifts and sleeps during the day, good luck using this oven without waking them up. I didn't want to return it because it was an excellent baker, but I just couldn't handle the loudness of the beeps. This was the best baker of all the ovens that I have tried, including the one I am using now.
Next I tried a humongous Oster extra large convection oven. It was a decent baker whenever I could get the temperature right, which wasn't often. I emailed Oster's customer service and asked if it was normal for the temperature to be so off and they said no. It must have been a defective unit, but I decided to return it and buy a different brand rather than exchanging it for a non-defective one because it was actually too big for our kitchen counter.

Right, that brings us to my current oven. It's a Cuisinart TOB-60. It's an okay baker. The top heating element is a little too close to the baked goods and I have to use a couple of different settings to achieve perfect bakes. But after having bought and returned so many ovens I decided to keep it. It's definitely not perfect. Sometimes the temperature is 25 degrees off, so I keep an oven thermometer in there at all times instead of blindly relying on the temperature dial. There is a convection option, but also a regular bake option which I use for delicate cakes, and I can isolate the bottom and top heating elements as needed. This is important and I'll tell you why in a minute.
*Start reading here if you skipped all the boring stuff!*
If I had a bigger budget I'd love to try a fancy Breville or some other posh oven. But I am not made of money. I do have a checklist of all the features that are important so that next time I am oven-shopping I won't be so clueless, and hopefully you will find them useful too.
- If it's a convection oven it should also have the option to bake in regular mode without activating the fan. If the fan is too strong it could dry out your cakes.
- There must be a decent distance between the heating elements and the oven rack. The way I set up my oven rack in the Cuisinart gives me two inches from the bottom heating element to the rack, and four inches from the top heating element to the rack. I'd like at least six inches from the top next time.
- I've learned that the ability to control which heating elements are turned on at any given time is important. Sometimes I like to get a bake started with only the bottom heating elements turned on (I do this by using the WARM setting instead of the BAKE setting) to keep the top heating elements from creating a crust or stunting the rise of cakes.
- I've also learned that toaster ovens temperatures can be unreliable and it helps to keep an oven thermometer in there to keep an eye on things.
- No loud beepings! Forthelovagawd! No loud beepings!
Now let's see how I bake perfect cupcakes in my Cuisinart TOB-60. This is how MY oven bakes perfect cupcakes. You'll need to play around with your oven's settings to find what works best for you. Stay near the oven and keep an eye on it while you're experimenting with different ways to bake your cakes! You never know when one of those little things is going to set something on fire!
 * Zingy Lemon Drizzle Cupcakes
1. I preheat the oven to 325 degrees F (160 C) on the WARM setting. Only the bottom heating elements will heat up. I always keep a thermometer in the oven so I can see when it's reached that temperature and I can make sure the temperature stays even during the whole baking time.
I don't start mixing the liquid ingredients into the dry ingredients until the oven has reached 325 degrees. That way the raising agents won't lose all their power before the cake even goes into the oven.
2. Once the temperature is reached and the cake batter is ready, I bake the cake for 12 minutes still on the WARM setting. This will allow the sides of the cupcakes to rise because only the bottom heating elements are working. If I bake them on the BAKE setting from the start, it means that the top heating elements will also heat up and it will make the top of the cake form a cracked peak in the center and the sides won't rise all the way up. You may be able to use both top and bottom heating elements if your toaster oven is large enough and there are a few inches between the top of your cakes and the top heating elements.
3. After 12 minutes I can see that the sides of the cupcakes have risen nicely and I can switch to the BAKE setting to activate the top heating elements as well as the bottom ones, and I bake the cupcakes for another eight minutes or so, usually at 350 degrees F (180 C) to make sure that the slightly higher temperature cooks the cake well. When the cupcakes are done and I remove them from the oven, they have lovely flat tops and they have risen evenly.
If there was a temperature spike while they were baking and the tops of the cupcakes are slightly domey in the center, you can use a solid metal spatula to gently flatten the tops ever so slightly as soon as they come out of the oven and while they are still hot. No need to apply much pressure, the weight of the spatula should take care of it.
Would you like to see a side-by-side comparison of two cupcakes baked using different oven settings? Allow me to oblige! The pink one was baked on the BAKE setting for 20 minutes. The turquoise one was baked on the WARM setting for 12 minutes and then on the BAKE setting 8 more minutes. See how the pink one is a bit shorter and domey and cracked?

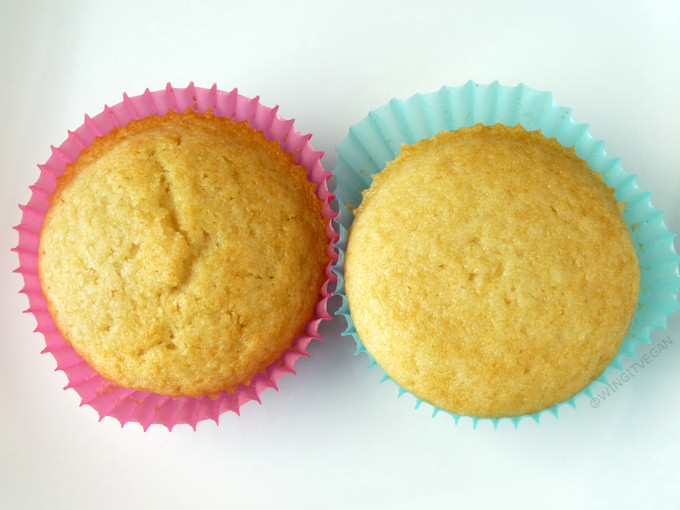

I used the same Vanilla Cupcakes for Two recipe for both cupcakes. Everything was mixed and measured the same way, the only difference was the baking method.
 * Vanilla Cupcakes for Two
There we are! Are you still alive or did you die of boredom? I will be sharing the recipes for all the cupcakes I've shown off here soon. Watch this space!
* That's a Doctor Who inside joke!
An alternative title for this blog post could be "Why I Tried Five Different Toaster Ovens in the Span of a Few Weeks!' I'll throw in some pictures of a few of the cupcakes I've made in my toaster oven to break up the text a bit. I wouldn't want you to die of boredom.
Last year Mr. Wing-It and I switched from devouring whole cakes to eating mini cakes or single cupcakes. The thing is that whenever I baked a whole cake or a whole batch of cupcakes, we would attack the sugary goodness as soon as it came out of the oven and we wouldn't stop until every last crumb had been dutifully inhaled.
Gluttons. Yes, I know. We were like cake locust. Or like the Vashta Nerada.*
In lieu of self control, I started baking two cupcakes at a time, or tiny four inch cakes instead of full sized ones. Same with cookies, instead of baking a dozen cookies I'd bake two big ones or four or six tiny ones. It's the only way to make sure we will not wolf down an entire cake or a whole batch of cookies in 24 hours! If it's not there, we can't eat it.
Make a full batch and freeze it for later, you say? Tried. Can't. Must eat ALL the cake in the house.
Anyway, at the time we only had a tiny Black & Decker toaster oven that had served us well for years whenever we wanted to make toast or reheat leftover pizza and whatnot. But it wasn't great for baking because the top and bottom heating elements were too close to the cakes or cookies or whatever it was I wanted to bake. I don't think they even make that model anymore.
So, I bought a bigger Black & Decker convection oven
I returned that one and bought a Farberware digital toaster oven
Next I tried a humongous Oster extra large convection oven. It was a decent baker whenever I could get the temperature right, which wasn't often. I emailed Oster's customer service and asked if it was normal for the temperature to be so off and they said no. It must have been a defective unit, but I decided to return it and buy a different brand rather than exchanging it for a non-defective one because it was actually too big for our kitchen counter.
Right, that brings us to my current oven. It's a Cuisinart TOB-60. It's an okay baker. The top heating element is a little too close to the baked goods and I have to use a couple of different settings to achieve perfect bakes. But after having bought and returned so many ovens I decided to keep it. It's definitely not perfect. Sometimes the temperature is 25 degrees off, so I keep an oven thermometer in there at all times instead of blindly relying on the temperature dial. There is a convection option, but also a regular bake option which I use for delicate cakes, and I can isolate the bottom and top heating elements as needed. This is important and I'll tell you why in a minute.
*Start reading here if you skipped all the boring stuff!*
If I had a bigger budget I'd love to try a fancy Breville or some other posh oven. But I am not made of money. I do have a checklist of all the features that are important so that next time I am oven-shopping I won't be so clueless, and hopefully you will find them useful too.
- If it's a convection oven it should also have the option to bake in regular mode without activating the fan. If the fan is too strong it could dry out your cakes.
- There must be a decent distance between the heating elements and the oven rack. The way I set up my oven rack in the Cuisinart gives me two inches from the bottom heating element to the rack, and four inches from the top heating element to the rack. I'd like at least six inches from the top next time.
- I've learned that the ability to control which heating elements are turned on at any given time is important. Sometimes I like to get a bake started with only the bottom heating elements turned on (I do this by using the WARM setting instead of the BAKE setting) to keep the top heating elements from creating a crust or stunting the rise of cakes.
- I've also learned that toaster ovens temperatures can be unreliable and it helps to keep an oven thermometer in there to keep an eye on things.
- No loud beepings! Forthelovagawd! No loud beepings!
Now let's see how I bake perfect cupcakes in my Cuisinart TOB-60. This is how MY oven bakes perfect cupcakes. You'll need to play around with your oven's settings to find what works best for you. Stay near the oven and keep an eye on it while you're experimenting with different ways to bake your cakes! You never know when one of those little things is going to set something on fire!
Right, this is how I do it in my Cuisinart oven:
1. I preheat the oven to 325 degrees F (160 C) on the WARM setting. Only the bottom heating elements will heat up. I always keep a thermometer in the oven so I can see when it's reached that temperature and I can make sure the temperature stays even during the whole baking time.
I don't start mixing the liquid ingredients into the dry ingredients until the oven has reached 325 degrees. That way the raising agents won't lose all their power before the cake even goes into the oven.
2. Once the temperature is reached and the cake batter is ready, I bake the cake for 12 minutes still on the WARM setting. This will allow the sides of the cupcakes to rise because only the bottom heating elements are working. If I bake them on the BAKE setting from the start, it means that the top heating elements will also heat up and it will make the top of the cake form a cracked peak in the center and the sides won't rise all the way up. You may be able to use both top and bottom heating elements if your toaster oven is large enough and there are a few inches between the top of your cakes and the top heating elements.
3. After 12 minutes I can see that the sides of the cupcakes have risen nicely and I can switch to the BAKE setting to activate the top heating elements as well as the bottom ones, and I bake the cupcakes for another eight minutes or so, usually at 350 degrees F (180 C) to make sure that the slightly higher temperature cooks the cake well. When the cupcakes are done and I remove them from the oven, they have lovely flat tops and they have risen evenly.
If there was a temperature spike while they were baking and the tops of the cupcakes are slightly domey in the center, you can use a solid metal spatula to gently flatten the tops ever so slightly as soon as they come out of the oven and while they are still hot. No need to apply much pressure, the weight of the spatula should take care of it.
Would you like to see a side-by-side comparison of two cupcakes baked using different oven settings? Allow me to oblige! The pink one was baked on the BAKE setting for 20 minutes. The turquoise one was baked on the WARM setting for 12 minutes and then on the BAKE setting 8 more minutes. See how the pink one is a bit shorter and domey and cracked?
There we are! Are you still alive or did you die of boredom? I will be sharing the recipes for all the cupcakes I've shown off here soon. Watch this space!
* That's a Doctor Who inside joke!
hi
ReplyDeleteAs my kitchen in my Northern Ireland apartment is simply equipped with a hot plate, microwave, and toaster oven, I have really learned some new cooking techniques. For the first 4-6 months I had been living here, I didn't touch the toaster oven. I grew up with a toaster oven but we only really used it for well, toasting things. I always use Lincat 4 Slice Toaster & this really high quality kitchen equipment.
ReplyDelete